Storing Locally Grown Food For the Winter
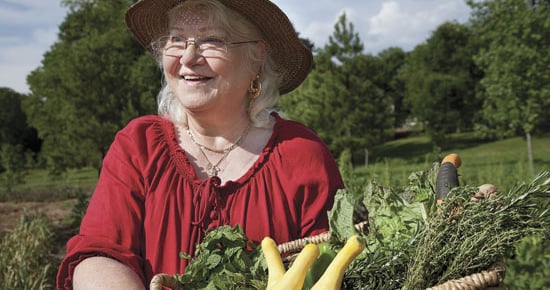


At the time of this writing, so many gorgeous plants are blooming in the garden. We are getting beautiful greens, radishes, peas, beans, cukes, zukes, and tomatoes will be coming soon. This is the time when I am just enjoying midsummer and yet I know that fall will be here soon.
I like to prepare things so that I can enjoy fresh, local produce throughout the fall and winter as much as I possibly can. I tend to think that I’m doing well for my family and myself when I do this, a bit like Laura Ingalls or something. It feels close to my roots to want to save, conserve and provide for my family by putting things up for future use.
Let me be honest here, though. Despite Vermont’s illustrious canning history, I’m not a canning person. I think the chemistry of it scares me. (What if I messed up and inflicted botulism on my family!) So I stick to freezing and dehydrating as ways of putting things up for the weeks and months ahead. Believe me when I say that I value the pioneering spirit, but I’m not the sort to can food, smoke meat and I don’t even have a root cellar. I do have a sunroom that becomes a walk-in fridge in the fall and then a walk-in freezer during the winter months. To each his own. I do my best to eat the best food on the planet affordably and it does feel good to do the kind of food prep that I do. It’s fast and easy, too.
Here in Vermont, the localvore movement is pretty big. We don’t have a long growing season but we love being able to eat wild foods and locally grown foods. Being locally minded means we put our time, energy and dollars into the local economy, into our own soil, into our communities. We also have a smaller carbon footprint on Earth because food won’t need to be traveling far to reach us out here in the middle of nowhere if we grow our own.
There is awareness, as well, that eating seasonally and fresh is best for the body. There is a reason why the juiciest fruits come out in midsummer when the sun is hot and the need to hydrate the body is so much greater. There is a reason why root vegetables grow more in the colder seasons when the heartier foods are more nourishing to the body. Fresh is best for sure, as well as accessible and affordable.
In order to make food affordable, accessible and as local as possible, it makes sense to take what is grown in the gardens or purchased at local farmers markets or CSAs and prepare easy, simple recipes and freeze them for future use. What I’ve found is that if I make recipes that have some fat in them, they hold up very well in the freezer. For example, tomatoes don’t do well on their own in the freezer but if I make a raw marinara sauce with them, they do extremely well in the freezer and I have the benefit of beautiful, healthy sauces that I can use all year long.
Freezer-Ready Raw Marinara Sauce
3/4 cup sun dried tomatoes, soaked for a half hour or more*
2 soft dates (medjool dates are the softest, remove the pit)**
2-4 cloves local garlic, peeled (less if you’re feeding children)
3 large local tomatoes, chopped
1 1/2 Tbsp Italian seasoning, or a good pinch of fresh oregano
1 tsp Celtic sea salt
1/3 cup olive oil
half a bunch of fresh, local basil, about 1/2 cup packed
Put all ingredients into a large food processor and process until smooth. Freeze in zip lock bags in the freezer.
*If using sundried tomatoes packed in oil, omit the oil from the recipe. Shorten soaking time by using a high-speed blender like a Vitamix or by soaking in warm to hot water. Make your own sundried tomatoes in a dehydrator. Simply slice tomatoes about 1/4 – 1/2 inch thick and lay out on dehydrator trays to dry until there is no more moisture in them.
** Substitute with a teaspoon of local honey or maple syrup if you prefer.
This sauce keeps for about 6-8 months in the freezer. When it’s been a bumper crop year of tomatoes, I’ve been known to make batch after batch on a Sunday afternoon that lasts for months and months. You can use cherry tomatoes, too; use a couple pints for each recipe and use less sweetener because the cherry tomatoes are like candy themselves. Depending on your family size, you can freeze these batches in 2-4 zip lock bags so that you can defrost only the portion that you want.
The fresh marinara sauce is excellent just as it is. If you cook regular pasta, it makes a delicious sauce. Defrost and leave it at room temperature or heat it up very gently. I’ve made fresh “pasta” by spiral slicing zucchini, carrots, and daikon. In the wintertime, I like to make a fermented “cheeze” out of nuts and with very thinly sliced turnips or beets, make a raw-violi that is amazing.
I’ve also used the raw marinara sauce for cooked lasagna and baked pasta dishes. Keeping it raw keeps all phytonutrients intact, but if you were to use this for cooking, you’d have some of the freshest tasting sauce that has been minimally processed and came from your own garden and kitchen.
Here’s a pesto recipe that makes good use of abundant garden herbs.
Herb Pesto
1 cup walnuts
1/2 cup pine nuts, sunflower seeds, or cashews
1 big bunch fresh local basil (about 1-2 cups packed)
2-4 Tbsp olive oil
3-4 cloves fresh garlic, peeled
1/2 teaspoon Celtic sea salt
Put all ingredients in a food process or blender and blend until smooth. Pesto is great on sandwiches, pasta, wraps, on salads, on pizzas, and as dips. Put into plastic pint containers (or two half-pint containers) and freeze for future use. Some folks freeze in ice cube trays for future use.
Substitute the basil with parsley and add two tablespoons of lemon juice — it tastes absolutely amazing! You can also substitute wild leeks (ramps), cilantro, radish greens, beet greens, or garlic scapes for the basil. When making pestos with other greens feel free to add lemon juice if desired. Lemon juice really makes the taste of the greens and garlic come to life and the citrus actually helps our bodies assimilate all the vitamins from the greens more easily. Adjust the flavors to your liking. To thin and make more of a dressing, start by slowly adding 1/2 cup of water, and adjust the thinness to your liking. Play and experiment. Magic can happen in the kitchen!
Vegan Cheddary “Cheeze” Kale Chips
What to do with all the kale that comes in the garden? If you have an oven or dehydrator, you can make kale chips and eat your local kale for months and months to come. There are sweet kale chip recipes as well as savory. I’m sharing my very favorite savory recipe. These are so easy.
Wash 2-3 bunches of fresh, local kale and de-stem so that you just have the leaves in a large bowl. If you don’t want to cut each individual kale leaf, hold the leaf with the largest part of the stem in one hand and grip the leaves with the other hand and pull down. This is a very fast and easy way to de-stem kale, collards and chard leaves. Tear them up into smaller sizes, but not too small because you are making snack chips. Next, make the cheeze:
2 cups raw unsalted cashews
1 large, local orange or red bell pepper
1/2 cup water
1/4 cup lemon juice
1/4 cup nutritional yeast
2 Tbsp raw tahini
2 tsp sea salt
2 cloves fresh, local garlic, peeled
1 small local onion, roughly chopped
Blend all ingredients in a blender until creamy. Add more water if it is too thick. You can use a food processor to process this if you don’t have a blender, but it won’t be as smooth and creamy. This makes about 4 cups of cheddary cheeze — great on salads, sandwiches, wraps, and as a dip. Massage the cheeze sauce into the kale, which, by the way, tastes heavenly as is, with no drying or crisping.
If you are using a dehydrator: After the cheeze is evenly distributed on the kale, lay out the kale onto the dehydrator sheets. You can stack the kale up to about 1-inch thick on each sheet. I’ve done thicker, but a shallower stack ensures a faster drying time.
To retain phytonutrients, set the temperature of the dehydrator to 105°F. 112-118°F is the temperature at which phytonutrients and enzymes are destroyed. It is okay to initially heat up the dehydrator to 135°F for the first hour if desired because the food is not raised to that temperature, and also because you’ll be backing down the temperature to 105°F after that.
Dehydrate overnight and check in the morning to see how crisp and thoroughly dried the kale chips are. Taste testing will be necessary and be forewarned that kale chips taste amazing right out of the dehydrator!
If you are using an oven: Evenly spread your kale chips onto cookie sheets or jelly roll pans about an inch or so thick. You have the choice to put your oven on a very high temperature like 400°F and put the kale in for about 5 minutes or 250-275°F for about 20 minutes. Either way, you will want to keep a close eye on the oven so you don’t burn your kale.
The drawback of using an oven is that your kale chips may burn. When you use dehydrators with temperature controls you can leave them in for a day and a half and you’ll get really crispy kale chips. In addition, all phytonutrients get destroyed in the heating/cooking process so if you want to retain them you’ll have to dehydrate.
Dried kale chips can last up to six months in airtight containers. You can save the little silicon packets that come in numerous other products and keep them in the containers to keep moisture out. At any point, you can re-dehydrate kale chips if they have lost some of their crispness. The little schnitzels that remain from these chips in the bottom of your tin taste great as salad toppers, too, so nothing is wasted.
Zuke Hummus
Here in Vermont there comes a time each summer when people have so much zucchini that they can’t even give them away. Here is an excellent recipe that I modified from Alissa Cohen for a delicious zucchini hummus that freezes beautifully.
4-5 medium sized, local zucchini, unpeeled, loosely chopped
1/3 – 1/2 cup raw tahini
4 cloves, fresh, local garlic, peeled
1/2 cup lemon juice
1/4 cup olive oil
1/2 tsp sweet paprika
a good pinch Celtic sea salt
a good pinch of cayenne pepper
Process all ingredients in a large food processor or blender. I enjoy this in the food processor because it remains a little chunky and tastes better that way.
The tahini and the olive oil give it enough fat that makes it freeze really well. This makes such a big batch that you’d want to put into half-pint or pint size containers. I tend to use pint-sized containers because once I defrost it I want to use it with everything. This makes a delicious dip, spread for sandwiches and wraps or salad dressing.
Dehydrating zucchini into chips is another lovely option to use your zucchini bounty. Use a mandolin or spiral slicer in order to slice them thinly enough. Zucchini is very watery so the dehydrating time is longer, but remember you also have the option to use the oven for faster drying time. Easy salt/vinegar chips can be made by spiral slicing zucchini into small slices into a bowl. Drizzle some olive oil, vinegar, salt and perhaps some Italian seasoning, and let stand for about 10-20 minutes (overnight is fine, too). Spread thinly onto dehydrator sheets or cookie sheets and dehydrate or bake as for kale chips. Make gourmet zucchini chips by using the cheddary cheeze or marinara sauce recipes and dehydrating them for the tastiest chips around.
Linda Wooliever is a healthy food chef and educator, teaching people how to live their best, most juicy life through delicious nutrition. She is the owner of Vermont Fiddleheads in Worcester, VT and runs an online business manufacturing the best nut milk bags on the planet. Visit www.vt-fiddle.com or call (802) 223-2111. Email Linda your food questions at linda@vt-fiddle.com.