Why I Ferment Vegetables
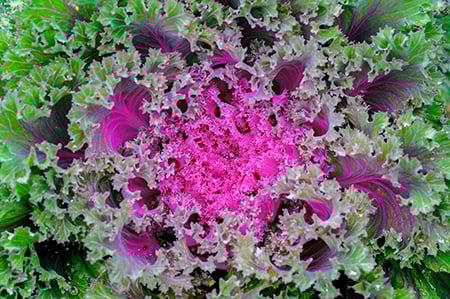
Flavor, convenience, healthy nutrition in so many vibrant colors — fermented vegetables are the ultimate health food.


Photo©TatjanaBaibakova/123rf
There’s more to fermented vegetables than probiotics, nutrient density, and food preservation. While these three attributes pique people’s interest in eating fermented foods, that’s not enough to make it a healthy habit. Just because you know something is good for you doesn’t mean you’ll eat it.
You have to want to eat fermented vegetables — to crave them — and the reason you will is the flavor. With fermenting, you’ll unlock new, unimagined, complex, deep flavors. Your tastebuds will be exposed to the unique flavors that develop from time and place with each delicious batch. You’ll eat fermented vegetables because you want to, not because you should. Incorporating fermented foods into your diet is all about the taste.
We all know that no matter how delicious something tastes if it’s not easy to prepare at the end of a busy day, it won’t make it to the dinner table. That’s where fermentation comes in: you can make delicious, nutrient-dense fermented vegetables whenever you have the time. Later, when there are no fresh veggies in the crisper drawer, or you don’t have the time to cook up something quick, you’ll have instant side dishes, salads, or flavorful foods around which to build a meal. Fermented vegetables are the ultimate convenience food!
Fermenting vegetables is a simple, inexpensive process that was and has been used reliably for a few thousand years. In the early 1900s, however, technical innovations promised things the crock couldn’t deliver. Canned jars of food remain stable on a shelf for years. Blanch your veggies, toss them into a bag, and store them in the freezer — what could be easier? There were no heavy crocks to clean, and no time spent monitoring and skimming off any impurities — all very modern, clean and safe. Time has come full circle, and now fermented foods are considered artisanal, a combination of traditional methods and scientific knowledge used to preserve food for flavor, color, and nutrition.
Preserving The Harvest
When we bring vegetables into the kitchen, we hope to preserve them long enough to enjoy them, so we wash them and keep them at the proper temperature. Despite that, a 2004 study by the University of Arizona found that 40 percent of the food grown in the United States goes to waste, and a large portion of that is what consumers let spoil in their fridges.
Every year the average household sends $600 in food to the landfill or compost pile. If you’re one of those people who couldn’t resist that beautiful bunch of turnips at the farm stand but have no idea how to prepare them, think fermentation. The lactic-acid fermentation is an ideal way to preserve the bounty while retaining nutrients and deepening the flavor profile.
Many batches of fermented vegetables that you make will be consumed within a few days or weeks — you won’t be able to help yourself — but fermentation is also a live, nutrition-enhancing, long-term preservation method for the bounty that comes from your vegetable patch, local farmers, and the farmers’ market.
If you’re serious about pickling everything in your garden, consider a ferment refrigerator, which is simply an old refrigerator you set in an out-of-the-way corner and fill with your finished ferments. It will allow you to catch your flavors where you like them and effectively keep them there. Two refrigerators might seem lavish, but it’s cheaper than digging a root cellar. And it’s all relative: modern Koreans, who traditionally buried their pots in soil or under straw for preservation, consider their kimchi refrigerator a basic household appliance.
At our stand at the farmers’ market, customers told us many a story about barrels of kraut in their grandparents’ basement. One woman said that when she was a child in North Dakota, her grandmother would give her a bowl and send her down the stairs, through a dark cellar, to get a portion of sauerkraut. She remembered removing the lid of the sauerkraut barrel and then carefully folding back a thick mat of mold. She’d fill the bowl, pat down the remaining kraut, carefully replace the mold mat, and cover with the lid. This mold mat sounds awful, right? But this original method kept the kraut anaerobic – that is, alive without oxygen – and therefore safe to eat.
Health And Well-Being
Science is in the nascent stages of understanding how our physical and mental health is interlocked with the vitality of the bacterial population inside us. We know fermented vegetables are a piece of the puzzle, not only in keeping probiotics in our diet, and therefore in our gut, but also in the transformation vegetables undergo to make their nutrients more available for our bodies to absorb.
Vegetables that have been cut or shredded and left in an airtight sanitary environment for several days or longer at room temperature, allow for the lactobacilli and enzymes that are naturally present in the vegetables to proliferate, creating an enzyme-rich, mineral-rich superfood that aids digestion, eliminates toxins, and restores or maintains a healthy inner ecosystem.
The famous British explorer and national hero, Captain Cook, is said to have kept scurvy at bay on his ships with mandatory servings of sauerkraut. This worked, because as we know now, fermentation increases the vitamin C content in cabbage, as well as other vitamins and minerals. In addition, fermented homemade vegetable juices provide more soluble iron than raw juice.
Among many other nutrients critical for the body’s well-being are B12 and folate. Vitamin B12 is difficult to come by for people on a strict vegetarian or vegan diet, as its present only in animal-based foods. Fermented vegetables, however, contain B12, which is produced by the bacterium ‘Lactobacillus reuteri’ during the process. This friendly microorganism also munches on vegetable sugars, converting the carbohydrates into acid, which is important for people watching their blood sugar. Fermented vegetables are wonderful for controlling sugar cravings.
There are social health benefits attached to this culinary art as well. When you cook with family or friends you create a bond. This process can start as early as choosing which seeds to grow, through all phases of the food preparation to gathering daily at the table. Food keeps us connected both tangibly and immeasurably. Consider fermenting vegetables as a group activity. Enlist the kids, your significant other, friends, and guests to chop, slice, or grate, salt, and massage, pound or press vegetables into a crock. No experience is necessary, so even the youngest members can participate.
You can make your own fermented vegetables or buy them in health-food stores. To prevent cramping as your bowels are reseeded, work your way into eating cultured vegetables by starting with 1 tablespoon a day and gradually increasing to at least half a cup a day. I cannot emphasize enough the value of these precious foods. Fermenting foods may seem time-consuming, but they are simple to prepare and well worth the effort. They are also a very economical way to reestablish your digestive system since they cost far less than expensive probiotics.
A WORD OF CAUTION: Fermented vegetables are loaded with beneficial bacteria intensely interested in cleaning up their new environment…your intestines. In their brave new world, the amazing microbes will do everything to fulfill their mission, co-creating with you to craft a healthy, beautiful body. They go to work immediately, softening hardened fecal material, attacking toxins, combating parasites, and balancing the acidity/alkalinity of both intestines. This is an excellent arrangement for you, but it often creates gas and bloating. The solution? Rinse out the toxic material drinking plenty of water daily, along with baths, saunas, enemas or colonics. Keep eating cultured foods and in no time at all, you’ll look and feel great. Trust the cleansing principle. Trust the microflora that protect and provide for you.
Basic Salt Brine
Makes 2 quarts/2 liters
I recommend making a big jar of it and keeping it handy in the refrigerator. You may try out lesser amounts of salt if you’d like, but keep in mind there’s more chance of bad bacteria entering when you reduce the salt, and the resulting ferments tend to be less crisp.
INGREDIENTS
2 quarts/2 liters filtered water
5-6 tablespoons fine sea salt
INSTRUCTIONS
- In a small saucepan, combine 2 cups of water and the salt and bring to a simmer. Set aside, stirring occasionally, until the salt is dissolved.
- Pour into a glass jar and add the remaining 6 cups of water. Cover and store in the refrigerator, where it will be kept indefinitely.
Sauerkraut: Pickled Cabbage
Makes 2 quarts/2-liters
UTENSILS
- Large nonreactive bowl
- Chef’s knife, food processor, or grater
- Kitchen pounder, meat mallet, or another kitchen instrument you can pound with
- Fermentation vessel, such as a wide-mouth mason jar or crock pot, to allow easy packing and removal of delicious bites (avoid narrow -mouth vessels)
- Weight that fits in the fermentation vessel to keep the sauerkraut in its brine. This can be a drinking glass, plate or bowl, jug filled with water, or a large rock for bigger vessels.
- 2 quart/2 liter wide-mouth jar with lid
- Clean dish towel
INGREDIENTS
5-pound (2.25-kilogram) head cabbage
2-3 tablespoons fine sea salt
INSTRUCTIONS
- Remove the outer leaves from the cabbage and cut in half. Remove the root end from each half (you can include the core in your sauerkraut).
- Chop or grate the cabbage in any thickness you like. I like a crunchy kraut, so I’ll quarter my cabbage, slice it into lengthwise strips, then chop the strips.
- Put half the cabbage along with half the salt in a large nonreactive bowl. Massage the salt into the cabbage to release water from it and start to create a salty brine. To speed up the process, you can finish by pounding your cabbage with a kitchen pounder. (Pounding may sound intimidating, but it can be a lot of fun, and it gives you the chance to pound your worries away).
- Add the remaining cabbage and salt, and repeat the massaging and pounding process.
- Pack the cabbage into a 2-quart/2-liter jar, a little at a time, with at least 1 inch of space remaining at the top. After each addition, pound it down with your pounder to release more water. You’ll know you’ve released enough water when the brine covers the surface of your cabbage. If it doesn’t, add some basic salt brine.
- Set up a weight for your fermentation vessel to keep the cabbage covered in brine. Place the vessel on a rimmed plate (a pie plate works nicely) to catch any potential overflow, cover with a clean dish towel to keep out insects, and set aside in a cool place away from sunlight to ferment.
- Check every day to make sure the cabbage is covered with brine, pressing down on it. If any mold develops, remove it, clean your weight if it comes into contact with the mold. Don’t worry; you’ve created an anaerobic environment in which it is almost impossible for bad bacteria to take root.
- Your sauerkraut will be ready in 1 to 4 weeks, depending on the season and kitchen temperature, and how tangy you prefer your kraut. Taste it along the way to check for doneness and consider eating it from various stages of fermentation for some cultural diversity. Cover and place it in the refrigerator, where it will keep for at least a year.
VARIATIONS
Pink Sauerkraut: Use half red cabbage and half green cabbage or all red cabbage. Or use green cabbage and add a shredded beet.
Cumin Sauerkraut: Add 1 tablespoon toasted cumin seeds.
Chile Sauerkraut: Add a handful of dried chiles, your choice of heat level. Crush them to release their seeds for extra spiciness.
Cucumber Pickles: Dill And Beyond
Makes 2 quart/liters
UTENSILS
- 2 quart/2 liter wide-mouth jar
- Weight that fits in the fermentation vessel to keep the pickles in their brine This can be a drinking glass, plate or bowl, jug filled with water, or a large rock for bigger vessels.
- Clean dish towel
INGREDIENTS
2 large handfuls fresh dill fronds, or 1 tablespoon dried dill seeds
5 small garlic cloves, peeled
1 teaspoon whole black peppercorns
2 pounds small to medium pickling cucumbers, rinsed
3 cups Basic Salt Brine
INSTRUCTIONS
- Put the dill, garlic, and peppercorns in a 2-quart/2-liter jar, then put the cucumbers on top. Pour enough brine over the cucumbers to cover them, leaving at least 1 inch of space remaining at the top.
- Set up a weight for your fermentation vessel. Place the jar on a rimmed plate (a glass pie plate works nicely) to catch any potential overflow, cover with a clean dish towel to keep out insects, and set aside in a cool place away from sunlight to ferment.
- Check your soon-to-be pickles every day and remove mold if any develops. Don’t worry if you don’t get all the mold; you’ve created an anaerobic environment in which bad bacteria can’t take root. Bubbles may start to rise and the brine will become cloudy; this is a sign of healthy fermentation.
- Your pickles will be ready in 1 to 2 weeks, depending on the season and kitchen temperature, and whether you like them half sour or fully sour. Cover and place in the refrigerator, where they will keep for about 2 months.
Megan Audrey Taylor lives on a regenerative homestead in Virginia. With a degree in Health Science, and certification as an Integrative Nutrition Consultant, she is studying for her MS in Clinical Nutrition and Functional Medicine. Her passion is to educate others about the healing power of food and provide simple, natural, and cost-effective methods to increase longevity, live in balance with our ecosystem, and feel better. Megan can be reached at meganaudreyofficial@gmail.com
Find holistic Nutrition Resources in the Spirit of Change online Alternative Health Directory.
RELATED ARTICLES:
Boost Your Immunity With Fermented Garlic Honey
Fermented Foods Are Good For You—Here’s Why